Fuji has a history of unusual sensor design. While the big sensor designers and manufacturers like Canon and Sony focused on boring stuff like making tinier pixels, reducing on-board circuitry, and improving read-out speeds, Fuji was doing wacky stuff like non-square pixels, tiny helper dynamic-range boosting pixels, and 45 degree rotated pixels. Fuji abandoned their SuperCCD approach around 2010 and for 2012 we have another new tech: X-Trans. Will Fuji abandon this effort in a few years, suffering from mediocre sales and 3rd-party support? We’ll see.
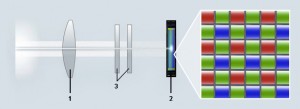
What is X-trans? Well, it’s basically a new way to filter color onto the sensor. Image sensors only detect the number of photons striking the sensor. To be capable of creating a color photograph,a color filter is applied over the sensor. Each pixels gets either a green, red, or blue filter. It’s arranged in a 4 pixels pattern: two greens, a red, and a blue. This is a Bayer filter:
To create a human-pleasing image from this, a demosaicing algorithm is used to give each pixel intensity information for all three colors. This requires a bit of interpretation and guesswork using the adjacent pixels. Because virtually every digital camera ever made uses this filter pattern there is excellent support, from both the manufacturers and third parties for converting this information into a photograph.
Bayer isn’t perfect though. How could it be? Each pixel on knows about one color. When resolving very fine detail the demosaicing algorithm can get confused and product strange patterns and colors – moire. This is dealt with by, believe-it-or-not, placing a filter in front of the sensor (#3 in the image above) to prevent certain frequencies of light from passing through. Which blurs the image.
Sigma’s Foveon effort attempts to address this by stacking three pixels on top of each other with each of those three pixels responsible for red, green, or blue. No demosaicing is required and the Sigma’s output is generally regarded as excellent. Except that Sigma’s implementation performs poorly when signal boosting is required (e.g., when increasing the iso).
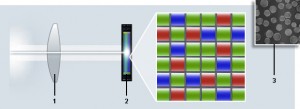
Fujifilm has taken an alternate approach. They have taken a normal sensor (rumors say it’s the Sony 16mp sensor used in cameras like the Nikon D7000, Pentax K-5) and glued a new filter pattern on top:
Instead of the 2×2 Bayer pattern you now have a 3×3 pattern, with proportionally more green pixels. Fuji claims that this more “random” pattern eliminates the need for the blurring anti-alias filter. Great! Problem – demosaicing. New patterns require new algorithms. Companies and developers have spent years optimizing their algorithms. It’s a non-trivial issue to support this sensor: Sandy, a digital imaging software developer has an interesting series of posts where he describes how he implemented a new demosaicing workflow for the Fuji X-Trans. He believes that this new sensor is a touch worse than the traditional Bayer sensor because interpolation of the color information is so difficult that the interpolated images have smeared color information.
I’m a bit less pessimistic. While I have little of Sandy’s knowledge, I do know that Fuji’s in-camera processing is superb. I assume that Fuji’s figured out a good set of algorithms to use and is keeping them all to themselves. Which if true, is good and bad. Bad because Fuji may be more interested more in “protecting” their intellectual property than optimizing professional software tools for their weird technology. Good because the future may hold better conversions for these RAW files I’m accumulating. Still, if Fuji or 3rd party people can’t get better optimized algorithms, then Fuji runs a genuine risk of loosing even more of their tiny market share. Still, as Sandy points out, Fuji likely doesn’t care.
—
What I’m concerned about now is getting the best RAW conversion possible with available tools. Fuji X Pro1 JPEGs are excellent, but I do need to go to the RAW in two common situations:
1. Poorly exposed photos (usually when blowing the highlights)
2. Bad white balance is selected (often indoors, like most cameras)
I’m a fan of Adobe Bridge for both workflow and RAW conversion. Unfortunately Adobe has done a piss-poor job in implementing their algorithm. I’m not sure whether it’s due to laziness or spite. Probably a little bit of both – Adobe gets handed a bizarre new format without accompany information on how to interpolate it and rather then spend hundreds or thousands of expensive hours optimizing a novel algorithm, they slap something together so they can check “Fuji X Pro1” off their list.
So this leaves, for the Mac, SilkyPix (Fuji’s official solution) and Raw Photo Processor.
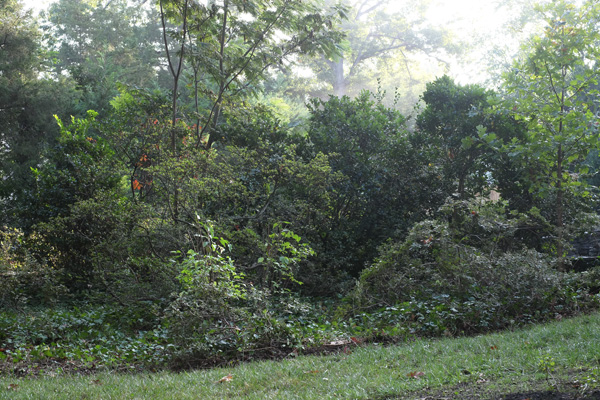
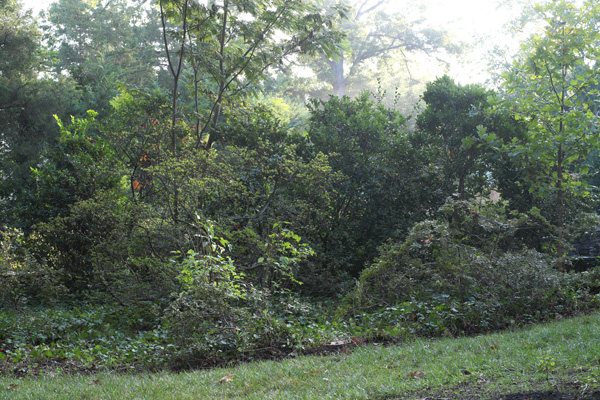
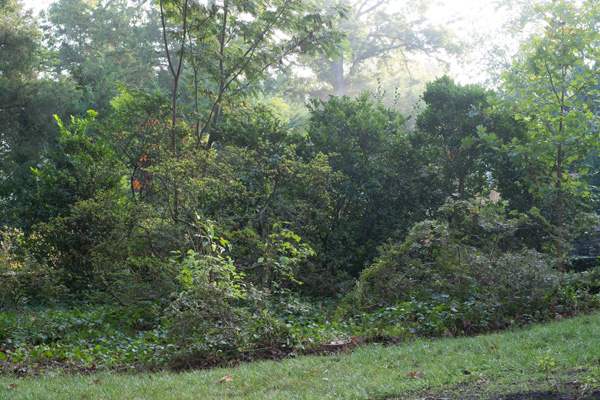
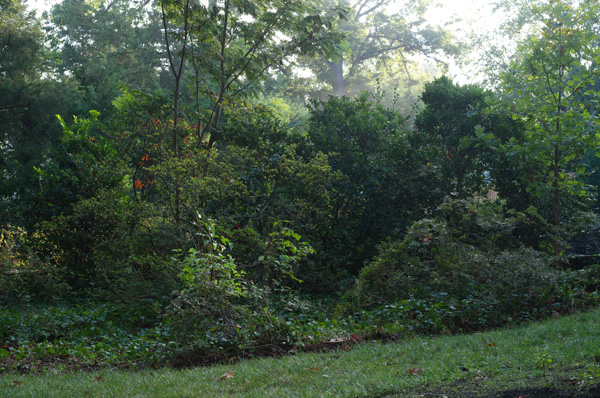
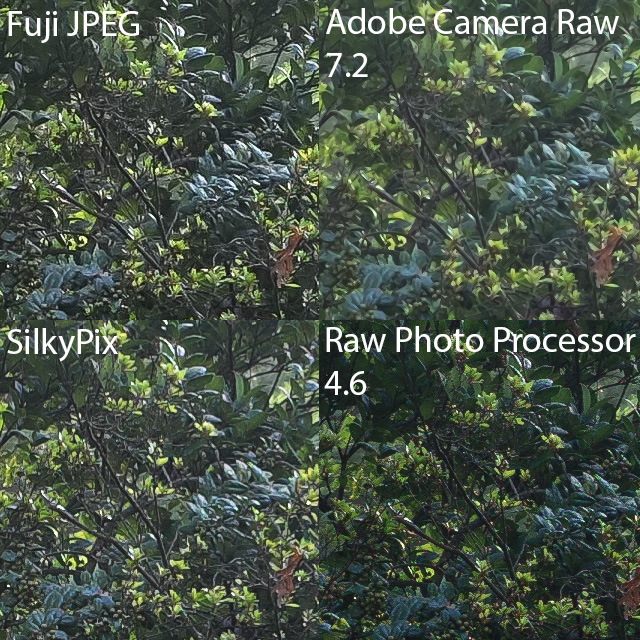
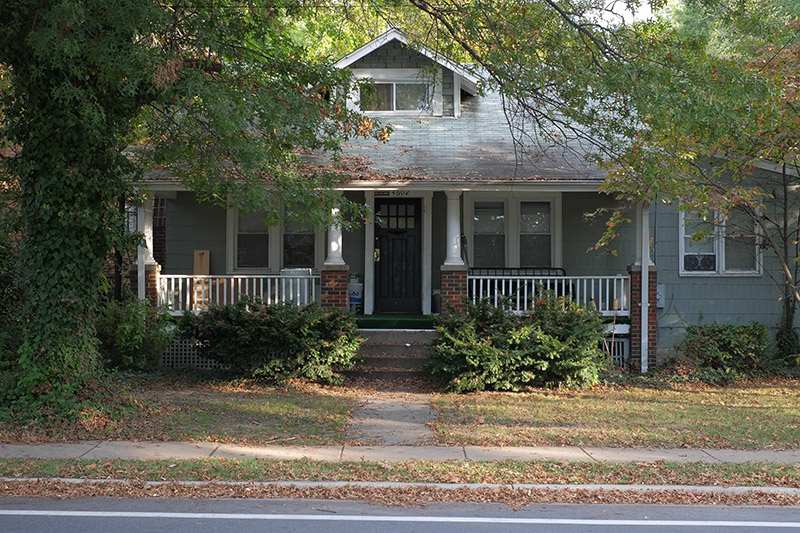
The test scene, as rendered by:
Fuji (X Pro1, in camera, “Provia”)
Silkypix (Strong contrast, Portrait color 3). I find these settings match Fuji’s X Pro1 Provia setting the most closely. The greens and reds are still a touch less saturated.
Adobe Camera Raw 7.2 (default settings). Greens more vibrant and the scene a bit brighter.
Raw Photo Processor (K64 color). About -0.75 EV darker. A bit more yellow than the Fuji JPEG. Very nice colors, in my opinion.
They all do a nice job rendering the scene. I do find SilkyPix’s default settings to be mediocre. The tweaks mentioned above help. It’s a shame Fuji didn’t put more effort into making it possible to closely replicate the in-camera options. They do have Film Color V2 which seems Velvia-like, as well as other color settings like Film Color A (Astia?). I’ll have to investigate this a little further.
Now to the 100% crops.
Sharpening settings:
Fuji JPEG: +1 in-camera sharpening.
Adobe: (amount:25, radius:1, detail:25. Default settings from Adobe)
SilkyPix: NaturalFine
Raw Photo Processor: none
Okay. Clearly Adobe sucks. It renders the leaves as indistinct strokes of color. It gets far worse if you try and sharpen even semi-aggressively, leaving jagged edges around color blobs. RPP does a nice job, but there’s always a smattering of colored pixels dotting the scene. These can be removed with a touch of color noise reduction in Bridge. But still, edges tend to be jagged. SilkyPix very closely matches the X Pro1 rendered JPEG. It looks a bit less sharp, but that’s more likely due to the lower contrast.
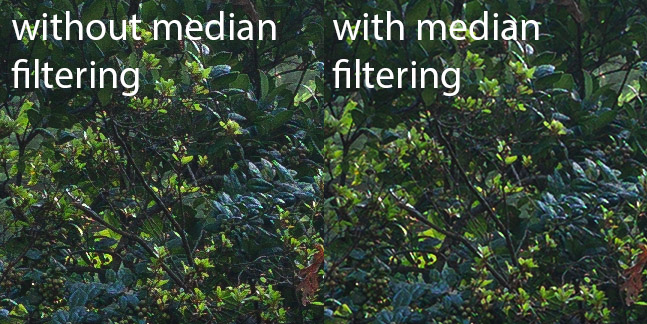
I recently came across a slightly different approach to RAW conversion. In short “Kinematic Digit” uses dcraw (which RPP uses) to convert the file and then, to deal with the jaggies, converts the image to Lab, doubles the image size, then uses a 1 pixel median filter to remove the jaggies in the lightness channel. This works fairly well at removing the dotty jaggedness while retaining the sharpness. Below we see RPP with and without the filtering.
For good measure, I came across another image of mine which also dramatically shows the watercolor effect
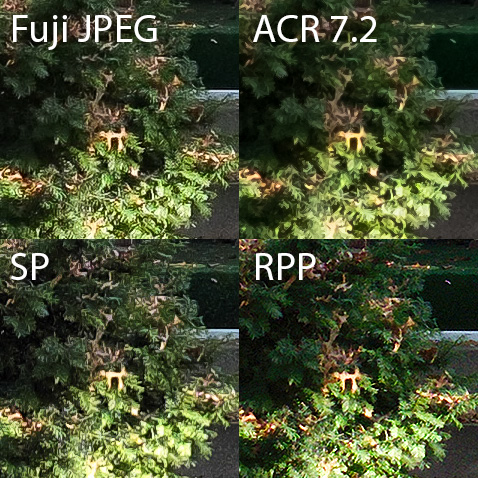
The comparison.
JPEG, looking good. ACR, looking bad. SP and RPP, looking almost as good as the JPEG. The RPP file was median filtered, as described above.
*Update (I forgot the settings)*
Fuji JPEG: In-camera: Provia. +1 sharpening in camera. ACR adjustments on the JPEG: +19 contrast, 71 sharpening amount, 0.5 radius. Detail 25.
ACR (on the RAW): Sharpening amount 48, 1.7 radius (works a little better than the default 1.0). Detail 25 (adding more adds a bit of dottiness).
SP: (same as above). ACR adjustments: 56 sharpening amount, 0.5 radius. Detail 25.
RPP: (same as above). ACR adjustments: 63 sharpening amount, 0.5 radius. Detail 25.
*end Update*
—
So SilkyPix, with a bit of tweaking can very closely match the X Pro1 JPEG. Remember to make sure the white balance is using “Camera setting”, not “Auto”. The settings I mentioned above can be saved as a “Taste”(?!) by going to “Parameter -> Add new taste -> All parameters…” If the scene has blown highlights, I also will use the SilkyPix “View -> Highlight controller” to help bring down the highlights, reducing the EV, and saving to 16-bit TIFF for further editing in Adobe Camera Raw. RPP, with the additional median filtering, also performs very well and has a pleasing color rendition (though a bit different looking than the Fuji JPEG).
Dave Etchell had an interview with executives from Fujifilm, where he asked “Do you have plans to improve the experience of photographers working with the X-series raw files in third-party software?” and got this response: “The camera itself can process the raw files, of course. Secondly, we also have our own SilkyPix software that comes with the cameras, which can work with the raw files. Then in addition, we are working with third-party vendors to provide support. For instance, Adobe already has made a software adapter for the X-Pro1. Our partnership is ongoing with a number of software companies.”
On the face, it sounds promising, but it’s really just a pile of empty words. The Fuji executive reiterates that they have their own software and that they are “working” and have a “partnership” with other companies. What does that mean? Probably nothing more than “we sent a few companies some basic specs on our format.”
Recently, some Fuji representatives have been saying something even more promising, i.e. that Fuji has provided specifications to Adobe and Apple to better support (or support at all) the X-Trans format. Still, my above paragraph applies until we see some real results.
Words aside, the issue remains that the three of the major RAW converters either have zero support for the X-Trans format (Aperture, CaptureOne) or mediocre support (Photoshop/Lightroom). Sure, Silkypix and Raw Photo Processor so a fairly good job, but photographers like using the established and polished workflows that the major RAW converters provide.
So, will this be resolved? It may depend on the success of the new Fuji XE-1, which uses the exact same imaging hardware as the X Pro1. If this becomes a wildly successful camera, then 3rd party companies will have additional pressure to fully support the format. Otherwise, they may just wait and see if Fuji gets disinterested and drops this unique approach.
—
If you want to show your processing chops, here are the two RAF files:
1401 (first image)
1501 (second image)
If you think you can do a better job, then take a crack at it and send me the full-sized JPEG along with the exact step/settings used.. If I get enough responses, I’ll do a follow-up post. Please keep the contrast/saturation/brightness similar to how I’ve processed the files to make comparisons easier.
Bad idea. You guys blew all of my bandwidth for the month! I’ll see if I can figure something else out. Any suggestions?

The RAW image quality of the Xpro-1 (Xe-1) should exceed the jpg IQ. I am not learning another software with some hideous user interface ( Silkypix ) in order to get close to the jpg. quality. A lot of people have an ‘established’ workflow with their respective software and don’t want to get stuffed around with the marketing driven ‘software idiosyncrasies’ of camera makers. If FUJI is not co operating with ADOBE in a meaningful way, I am not going to buy The FUJI X line. Their loss. Regards,Hans
That sums up my feeling – except that I’m willing to shoot JPEG/RAW and do the occasional Silkypix/RPP processing for the high-maintenance photos. The Fuji X is the only mirrorless system with 1. fabulous lenses, 2. an OVF, and 3. affordable pricing (unlike Leica).
If this is a deal breaker (and in my opinion, it shouldn’t be unless you need to regularly process large numbers of landscape photos at full-resolution), then you should spend your money elsewhere. I’m not holding my breath for an Adobe/Aperture/whatever resolution. I’m working with the constraints because it’s worth it for me.
Hans: Fuji will survive without your purchases.
Hi David
Great work and I agree.
The JPEG-OOC (out of cam) are awesome and it is a “shame”, that Fuji haven’t find a competitior for developping a better software then the Raw File Converter EX from Silkypix.
There are no workflow for the RAF-file till yet!!!!
RPP, Adobe and Raw File Converter EX works bad. The quality is only 50% from the JPEG!!!
Therefore, I suggest all X-Pro1 and X-E1 User to write to Fuji and to tell them, that we need a standalone software from the camera internal software!!!!
I have done it!
And I adore my X-Pro1! Hugh Digicam, as all the best analog camera in the past!!!!
Fuji made a great work with the new X-Trans-Sensor and the the two X-Digicam!!!!
Many thanks Fuji and go one and give us that software we are expecting!!!
Where can we email FUJI?
hi
here the fill in email from the headquarter of Fujifilm Tokyo:
https://www.fujifilm.com/cgi-bin/mail/form.cgi/contact_tokyo_headquarters
Go on folks and push fujifilm to go further with it!!
many thanks for all
Hi guys,
yes indeed, it´s a pitty that the RAW Support is that much crappy…
That´s why i´m shooting in RAW and JPG modus.
Which settings are you using in your X-Pro1 / X-E1 (im X-E1 owner)?
P.S.: I also sent an email to Fuji… we´ll see…
Cheers,
Damian
I sent my note today. If you haven’t, do…and remember you are sending to a culture that prizes graciousness and courtesy, so be very polite.
Today I shot my first tests with the X-E1, using Adobe DNG Converter. The results are abominable, but I don’t know if the culprit is Adobe or the sensor. There is a regimented pattern throughout each image, equally spaced rows of slightly dark dots, yielding the look of fabric. Because of the soft resolution of the zoom in the kit, images need considerable sharpening, which of course makes the pattern more obvious. A newly painted red brick wall is the worst image, likely because of the massive interpolation needed. But the pattern is quite apparent onscreen at 200 percent on a gray concrete wall, and on large prints at 100 percent.
I will try other means of conversion as you suggest and report results. If it looks like the sensor is the cause, I’ll try the new Sony full-frame camera.
Thanks for this post!